Realistically, I want to change my thesis to be something education related. I don’t know what yet, but I am also still working on my original thesis.
Prototype
Most of this semester has been devoted to research, rather than development. As a result, my proposal has ended up with a lot of citations. It’s still cool though!: https://docs.google.com/document/d/11NY0pPt_b05-1N9VGRF2Ry8K4MKvD0Pt7cqywtGJ0e0/edit?usp=sharing
A lot of my project is inaccessible to people because of how I’ve approached it, so I am going to try and break it down a bit more here.
A Basic and GENERAL Introduction To 3D Models
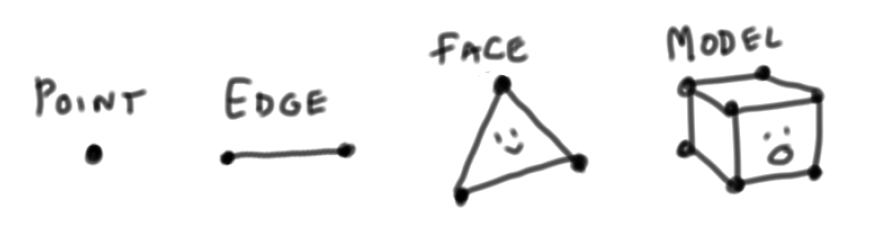
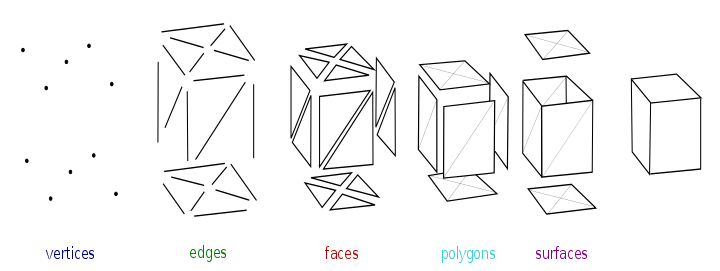
3D models are collections of vertexes, that are connected to one another with edges. When enough edges are connected, they create faces, and then when faces are connected, they create meshes and models.
As the smallest building blocks, vertexes pretty much just know their own X, Y, and Z position.

When used in a 3D model, vertexes also have normal values. These are used to calculate how much light hits that point of the model. Faces also get normals!
A Basic Introduction To Shaders
Shaders are blueprints that tell computers how 3D models are supposed to look.
They do this by calculating a lot of things in smaller steps. There is a whole pipeline of steps!

Shaders take the information from the 3D scene, such as what the lighting is like, what materials are there, where the camera is looking, etc. and help output a 2D representation of all that data.
The ones that I will be most focused on are the Vertex Shader and the Fragment Shader. Traditionally, I would be identify and apply math to change how the object is rendered.
However, I am not hard-coding the majority of this project, as both Unity and Blender have node-based shader editors, that are more friendly for making my project available for others.
These work by having a visual ‘input-output’ system where users can stick things together and get instant visual feedback.
Post-Processing
Done after everything else is processed, post processing can be used for extra visual flourish and effects.
Game Design for the Demo
To show my project more easily, I am making a game demo in Unity.
This is not meant to be a demo for a larger game, it exists to see if my process is fast enough to be used. If the game lags on all but the greatest PCs, it is not practical and cannot be used in the ideal applications. For example, there will be a day / night system to ensure that the shader performs well and looks good with changing light conditions.
Players can look around, walk in the direction they are facing, and walk backwards. If there is an area where a player can interact with a scene, a GUI ‘!’ will appear over the area. Pressing a mouse or the x button will signal interaction.
If there is a puzzle, an animated transition will take the player to a separate screen of the interaction [where the background is custom built to be clear and non-intrusive], where puzzles may occur.
Accessibility: any spoken text will include subtitles, and sound effects will be captioned. The movement key controls will also be able to be remapped for more control, and I will be using color-blindness post-processing effects and visual icons to represent intractable objects, rather than relying on pure color.
Progress on Implementing The Two Parts
Has not been approached yet. See you next semester for that!